How to Free Up Storage on Android Without Deleting Your Photos
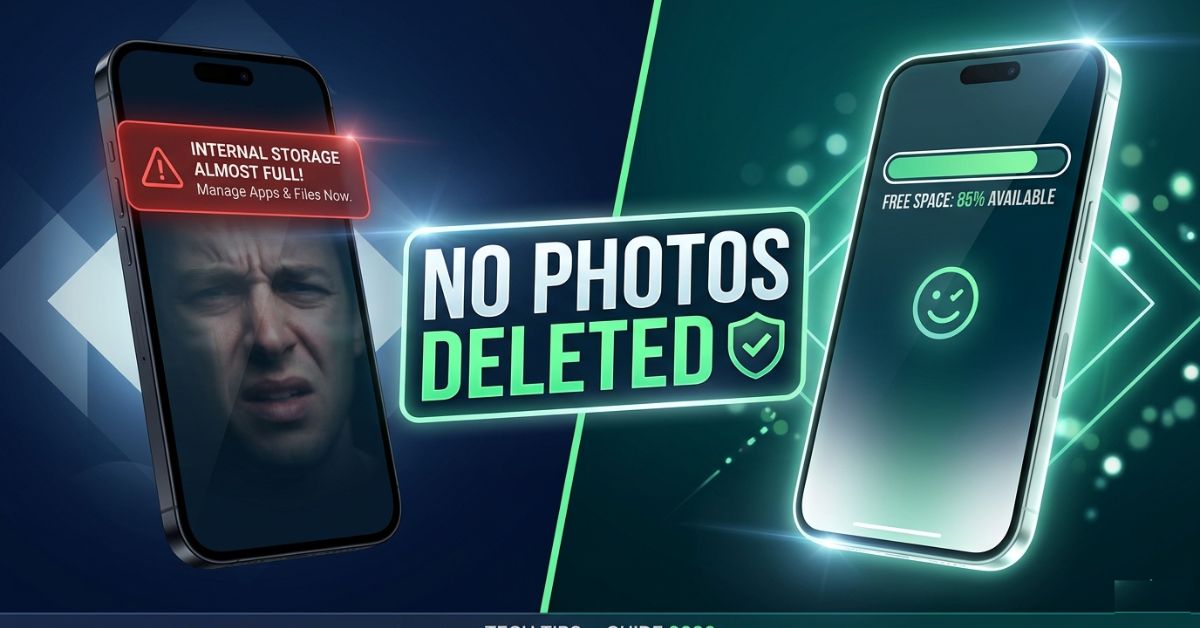
Most people respond to a full Android phone the same way: they open the gallery, scroll through years of photos, and start deleting memories to buy a few days of breathing room. This guide explains why that approach consistently fails and what actually works instead. Every step below recovers more storage than photo deletion would, with nothing you care about permanently removed.
Your Photos Are Not What Is Filling Your Phone. And That Changes Everything.
Here is the thing nobody says when your Android phone hits the storage limit: the panic that follows is almost always misdirected.
The moment “Storage almost full” appears, most people open the gallery, start scrolling through months and years of photos, feel that particular low-grade stress of deciding which memories are expendable, delete a few dozen things they might regret later, and buy themselves maybe three days before the warning comes back. Because the photos were never the problem.
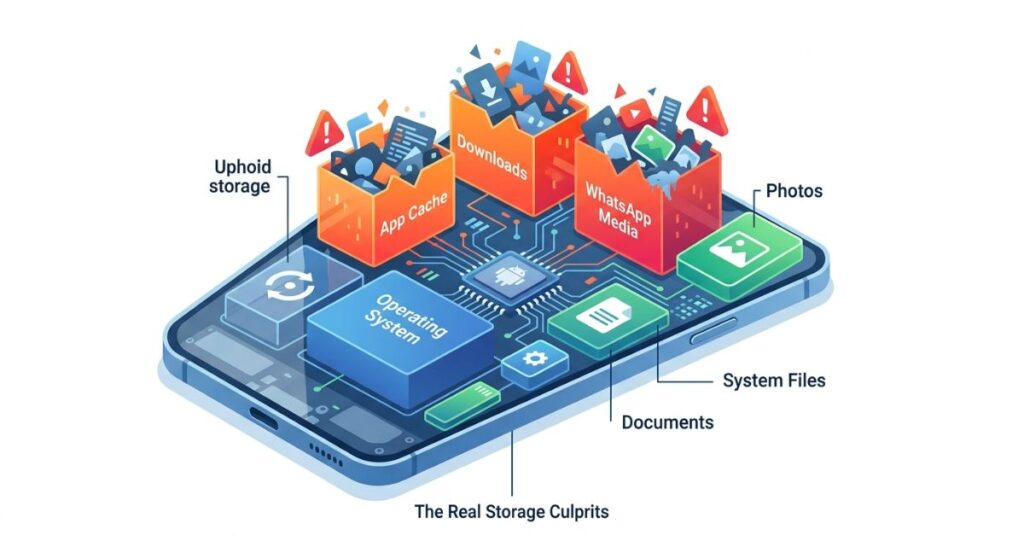
There is something almost deliberately confusing about how Android presents storage to its users. The gallery is front and center. Photos are visible, browsable, obviously “taking up space.” The actual culprits include the 3GB Instagram cache that has been growing since the day you installed the app, the WhatsApp folder silently collecting every video from every group chat you have ever been in, the offline Netflix episode from a trip four months ago, and the Downloads folder that has never once been cleaned out. None of these announce themselves. They sit in system directories and app folders with no gallery thumbnail, no obvious access point, no indication of their actual size.
The result is that people delete photos, irreplaceable things, to solve a problem cause by temporary files and forgotten downloads that you can remove in minutes with nothing lost.
This guide is about fixing the actual problem. In order of impact, with nothing that matters deleted.
The Real Reason This Keeps Happening
Android’s default configuration is not designed for users who care about storage health. It is designed for engagement, and engagement-optimised apps behave in ways that are genuinely costly to your available space, by default, indefinitely, until someone actively changes the settings.
Consider what happens in the background of a typical Android phone on a typical day. Instagram caches every image and video you scroll past. YouTube pre-buffers content. WhatsApp auto-downloads every photo and video sent to every group chat. Telegram does the same. Chrome holds a cache of every website visited. Spotify caches album art and song data. TikTok’s cache management is among the most aggressive of any popular app, reaching 2GB on a phone used daily for just a few months.
None of this is accidental or incidental. Caching aggressively means the app loads faster, which means the user experience feels smoother, which means engagement metrics improve. The app benefits. The user holds the cost, in storage space and in the eventual experience of a phone that feels inexplicably full.
The other half of the problem is that Android’s storage interface was, until relatively recently, deliberately vague about where space was going. This is not a conspiracy. It is a design priority. Showing users precisely how much space each app was consuming in background caches and automatic downloads would raise uncomfortable questions about why apps are allowed to behave this way by default. The interface has improved, but the defaults have not changed.
Understanding this changes the approach. The problem is not your photo habits. It is that your phone has been running on accumulation-by-default settings for however long you have had it, and nobody cleared the ledger.
First: Find Out What Is Actually Using Your Storage
Before touching anything, spend ninety seconds getting the real picture. This single step prevents the common mistake of clearing the wrong things first.
Go to Settings then Storage. What you see here is live, accurate, and broken down by category: Apps, Photos and Videos, Audio, Downloads, System and Other.
Here is what a typical unmaintained phone’s breakdown actually looks like, not what people expect, but what the numbers show: Apps at 18-22GB. Other at 10-15GB. Photos and Videos at 5-8GB. Downloads at 3-6GB. The photo library that caused the anxiety is often the third or fourth largest category, sitting behind App data and Other, neither of which the user ever consciously filled.
Screenshot this breakdown before you do anything. Check it again after each step below. This turns a frustrating guessing game into a clear, measurable process where you can see exactly which step recovered how much space.
Step One: App Caches. The Fastest Large Recovery Available.
App caches are the single most reliable source of recoverable storage on a maintained Android phone and they are the right place to start because the recovery is large, immediate, and completely consequence-free.
The principle is straightforward: apps store temporary files locally to load content faster. The reality is that these caches have no enforced size ceiling on most Android versions, are rarely cleared by the system automatically and accumulate indefinitely across months and years of use.
What this looks like in practice: Instagram’s cache on a daily-use phone sits between 1GB and 3GB. TikTok’s is frequently higher. YouTube, Snapchat, Chrome, and any streaming service each add their own contribution. On a device in active daily use for twelve months without cache management, total cached data across social and streaming apps commonly reaches 6-10GB. On heavily-used devices with multiple active apps, 12-15GB is not unusual.
Clearing all of it takes four minutes. Nothing is lost. The cache rebuilds over subsequent use, which is normal and expected, but it rebuilds from current content, not a year of accumulated files from sessions that will never be revisited.
On Android 12 and above:
Settings, go to Storage, then Free Up Space. The system surfaces cached files as the first recommendation. Tap Clear.
On older Android versions:
Settings, go to Storage, click on Cached Data, then Clear.
For individual apps with large caches:
From settings to Apps to [App name] then Storage, then Clear Cache. Do this for Instagram, TikTok, YouTube, Snapchat, Chrome and any streaming apps. Each of these reliably holds 200MB-2GB independently.
The one thing not to confuse:
Clear Cache and Clear Data are different buttons in the same screen, and the consequences are completely different. Clear Cache removes temporary files: login intact, preferences intact, nothing reset. It wipes the app to its factory state: logged out, preferences gone, saved content removed. For storage recovery you want Clear Cache. The two buttons sit next to each other. Read them before tapping.
Step Two: The Downloads Folder Nobody Cleans
The Downloads folder is the most consistently underestimated storage problem on Android, not because individual files are enormous, but because the folder accumulates from every source simultaneously and is never automatically cleaned.
Browser downloads. Email attachments saved to the device. PDFs opened once from a link. APK installation files for apps you installed six months ago and the installation file is still sitting there at 80-200MB. Video files downloaded from a browser. Documents transferred from a computer. Every single one of these lands in Downloads and stays there indefinitely unless you go looking.
Open the Files app (built-in on most Android devices, or Files by Google if it is not present). Navigate to Downloads. Sort by size, largest first. Start at the top.
APK files are the first priority. If an app is already installed, its APK installation file is completely redundant and can be deleted immediately. These commonly run 60-200MB each and there are frequently multiple of them. Delete every APK you find. None of it affects the installed app.
After APKs, work through the rest sorted by size. For anything you want to keep but do not need on your device constantly, such as documents, reference PDFs, and files you might need later, upload to Google Drive and then delete the local copy. Available whenever needed, no longer consuming device storage.
Most users find 1-4GB recoverable in Downloads on first pass. On devices that have never been checked, significantly more.
Step Three: The Messaging App Problem Most People Do Not Know They Have
The single most surprising storage conversation most people have with their own phone happens when they first check how much space their messaging apps have accumulated. The number is almost always larger than expected, often much larger. And almost none of it was saved intentionally.
WhatsApp, Telegram, and similar apps auto-download received media by default. This means every photo someone sent you in a group chat, every forwarded meme video, every voice note, every document. All of it is saved to your device automatically, without you ever tapping a save button, into a folder you may have never opened.
On a phone where messaging apps have been in active use for a year or more without any management, this automatically accumulated media commonly sits at 5-15GB. On devices in multiple active group chats, the number goes higher. The important point is that none of it represents something you chose to keep. It is content that arrived and was stored on your behalf by default settings optimized for convenience, not storage health.
For WhatsApp:
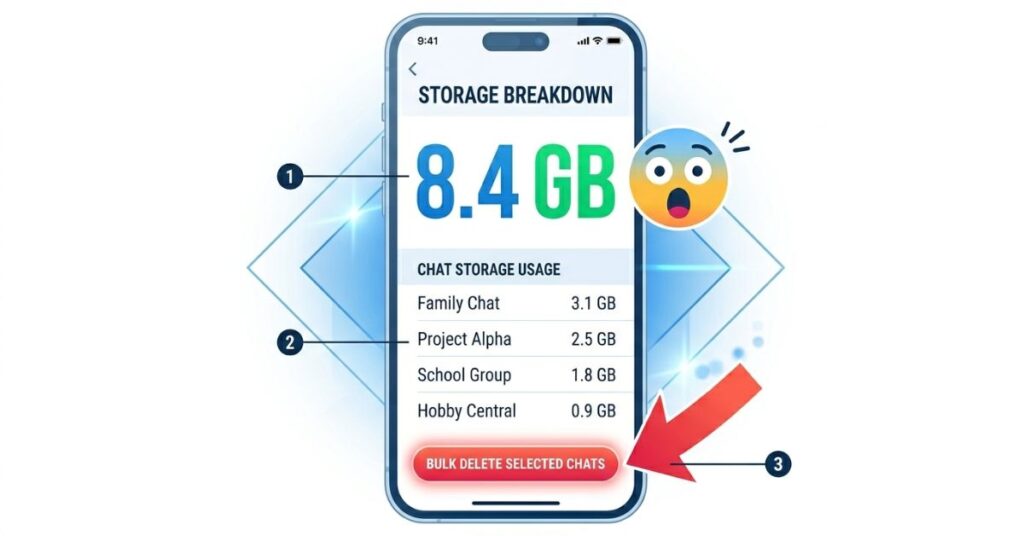
Open WhatsApp and click Settings, go to Storage and Data then Manage Storage.
This screen shows exactly how much space each chat is consuming. It also gives you the ability to sort by largest files across all chats and delete them in bulk. Deleting received media files here does not delete the chat history, the messages, or anything you sent. It only removes the locally stored copies of files that were sent to you.
After clearing existing media, fix the default behavior:
WhatsApp then click on Settings then Storage and Data then click Media auto-download. Set Videos to “No media” on all three connection types. Videos are the largest files by far and the ones most worth blocking from automatic download. For photos, Wi-Fi only is a reasonable middle ground.
For Telegram:
Settings, go to Data and Storage, click on Storage Usage then Clear Cache. Then set auto-download limits to prevent future accumulation at the same scale.
Step Four: Offline Streaming Content You Forgot You Downloaded
If you use any streaming service such as Netflix, Spotify, YouTube Premium, Amazon Prime Video, or Pocket Casts, check whether you have downloaded content sitting unused on your device. Offline downloads are among the most efficient single-item storage consumers on Android, and they are consistently forgotten.
A single HD movie downloaded before a flight is 1.5-4GB of storage. A downloaded podcast season is 300-600MB. A YouTube playlist downloaded for commute listening that has not been opened in three months is still sitting there at whatever size it was when it downloaded. Some streaming apps also cache content for offline use automatically without explicitly asking permission. Netflix and Spotify both do this under certain settings.
Netflix: Open the app and go to Downloads then click delete watched or no longer needed content.
Spotify: Settings, click on Storage, then Delete Cache and separately review downloaded playlists and podcasts for content that can be removed.
YouTube: Library, then click Downloads then manage and remove individually.
Every item removed here is fully redownloadable on demand. The storage recovery is immediate and carries zero permanent cost.
Step Five: Back Up Photos, Then Remove Local Copies
This is the only step in this guide that involves photos, and it does not delete a single one. It moves them.
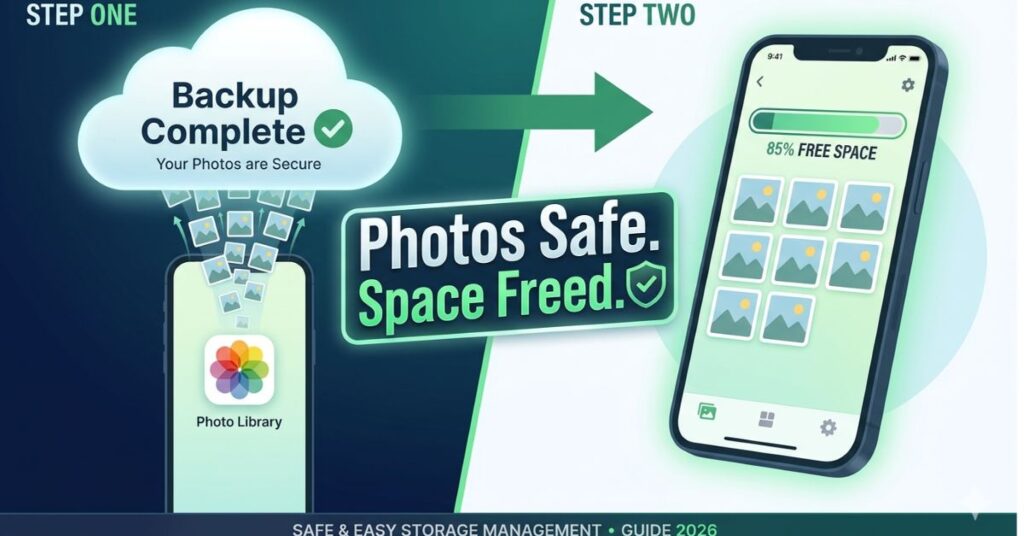
Google Photos backs up your entire library to cloud storage and, once confirmed complete, lets you remove the local device copies while keeping every photo fully accessible through the app. They appear in your gallery exactly as before. They open, zoom, share and download on demand. It just no longer consume local storage.
Setting up backup correctly: Open Google Photos, then Profile picture, go to Photos Settings, click on Backup, then Backup is on.
For backup quality, “Storage saver” compresses slightly and does not count against your Google account storage. “Original quality” keeps exact files and uses your Google account storage (15GB free, then paid plans). For most users, Storage saver produces photos that are visually indistinguishable from originals at normal viewing sizes.
Before removing local copies, confirm backup is genuinely complete: This is not a step to rush. Open Google Photos, then go to Profile picture, then Photos settings, click Backup. Wait for the message “Backup is on and up to date” with no items showing as pending. If backup is still in progress, wait and ensure you are on Wi-Fi, since backup runs on Wi-Fi by default.
Once backup is confirmed: Google Photos then click on Library, go to Utilities, then Free Up Device Storage.
This step typically recovers 3-10GB on a device with a year or more of photos. On a device with several years of unmanaged photo accumulation, the recovery can be significantly larger. Every photo remains accessible and downloadable. The storage is just no longer local.
Step Six: Audit Apps by Total Size, Not Just What You Remember Downloading
Insight moment 3: People think about app storage in terms of the install, specifically the 80MB download from the Play Store. What they almost never account for is what an app accumulates over time. An app installed at 80MB is commonly 400-800MB after six months of regular use, because the app storage includes the base installation plus all user data, saved preferences, offline content, and local databases the app has created since installation.
This means that uninstalling an app you have not used in two months recovers far more than just the install size. It recovers everything the app accumulated during its time on the device, and the app can be reinstalled from scratch in under a minute if you change your mind. There is no permanent cost to uninstalling an unused app that does not exist with deleting an unused photo.
Go to Settings, then click Apps. Tap the sort option and sort by Size. Look at the top twenty entries.
For any app you have not opened in the past four to six weeks, ask one question: is this genuinely useful enough to justify the storage it is occupying? Games deserve particular scrutiny here. Mobile games after downloading in-game assets commonly reach 1-4GB, and a game not opened in three months is a straightforward recovery that costs nothing beyond reinstalling if the interest returns.
Systematic app review on a device that has never done it commonly recovers 3-6GB from apps alone, not counting cache, which was already addressed in Step One.
What Actually Matters More Than Doing This Once
Every step above solves the current problem. Only two changes solve the recurring problem, and the recurring problem is what costs people the most in storage and in deleted photos over time.
Change one: Google Photos backup, always on. This is not a one-time action. It is a permanent background setting that ensures your photo library is continuously backed up. With this active, you can use the Free Up Device Storage feature regularly, even monthly, without anxiety about losing photos. The backup confirmation loop becomes habit, and it removes photos-as-storage-concern from the equation permanently.
Change two: Messaging app auto-download settings. WhatsApp and Telegram are the two most consistent re-fillers of recovered storage on Android. Changing auto-download to Wi-Fi only for photos and never for videos addresses the largest continuous source of unintentional storage accumulation. Do this once in each app and the dynamic fundamentally changes. Instead of passively receiving gigabytes of content from group chats, you choose what to download and when.
These two changes together, backup on and auto-download controlled, transform storage from a problem that recurs every few weeks into something you check monthly in five minutes and rarely think about otherwise.
Common Mistakes Worth Avoiding
Deleting photos before checking the storage breakdown. The storage breakdown in Settings takes ninety seconds to check. It consistently shows that photos are not the primary issue. Check it first. Every time.
Confusing Clear Cache with Clear Data. These are different buttons producing completely different outcomes. Clear Cache: safe, recovers space, nothing lost. Clear Data: logs you out, resets the app, potentially removes saved content. The buttons are adjacent in the same menu. Read before tapping.
Freeing up Google Photos space before confirming backup is complete. The backup confirmation message in Google Photos is not cosmetic. It is the actual status of your cloud copy. If it shows items pending upload, those items do not yet exist anywhere except your device. Removing local copies before backup confirms completion means permanent loss. Wait for the green “up to date” status every single time.
Treating the Downloads folder as permanent storage. Downloads is a transit folder. Files land there from every source and stay until manually removed. A quarterly check of this folder (sort by size, delete what you no longer need) prevents 2-4GB of pointless accumulation from becoming normal.
Buying a new phone to solve a storage problem. This one deserves direct treatment because it happens more than it should. A new phone in its first weeks has abundant free storage and therefore feels fast and responsive. The storage problem that motivated the purchase returns within twelve to eighteen months unless the settings and habits that caused it change. The problem was never the hardware. It was the defaults. A new phone running the same defaults produces the same outcome on a longer timeline.
When Storage Problems Become Performance Problems
A phone at 95% or more capacity does not just show a notification. It behaves differently, in ways that most people attribute to age or hardware decline rather than the actual cause.
The camera starts refusing to save photos mid-session because there is insufficient free space to write the file. Apps crash or hang unexpectedly because they cannot create the temporary files they need to function. System updates fail to download or install. App updates queue indefinitely without completing. The entire phone feels sluggish in a way that clears immediately after the storage is freed, which makes clear that the sluggishness was always a storage symptom, not a hardware symptom.
This is the failure mode that drives the most unnecessary phone upgrades. The device feels “old and slow” in a way that a new phone resolves for about fourteen months, until the new device hits the same storage threshold under the same default settings and starts exhibiting the same behaviour.
Understanding that most “the phone is getting old” experiences below a certain device age are actually “the phone is nearly full” experiences changes the calculus entirely. Maintenance first. Upgrade only if maintenance does not resolve it.
What You Should Do. Step by Step.
Step 1: Settings to Storage. Screenshot the full breakdown. Note the largest category. This is your baseline.
Step 2: Clear app caches individually for your five most-used apps: Instagram, TikTok, YouTube, WhatsApp, Chrome. Then Settings to Storage then Free Up Space for a system-level sweep.
Step 3: Files app to Downloads to sort by size to delete APK files, one-time downloads and anything you cannot identify. Move keeper files to Google Drive first, then delete local copies.
Step 4: WhatsApp to Settings to Storage and Data to Manage Storage then delete large received media by chat. Change auto-download: Videos to No media on all connections. Photos to Wi-Fi only.
Step 5: Netflix, Spotify, YouTube and any other streaming app to delete all offline downloaded content you have already watched or no longer need.
Step 6: Google Photos to confirm Backup is on and up to date to Library to Utilities then Free Up Device Storage. Do not skip the confirmation step.
Step 7: Settings to Apps to sort by size then uninstall every app not opened in the past six weeks. Particularly games.
Step 8: Screenshot Settings then Storage again. Compare to your baseline from Step 1. Note what recovered the most space. That is what needed the most attention on your specific device.
Step 9: Set a monthly calendar reminder. Ten minutes, first Sunday of each month. Repeat steps 2, 3, and 5. The first full run takes forty-five minutes to an hour. Every repeat takes ten.
Frequently Asked Questions
Final Thoughts
The “delete photos to free up storage” loop is one of the most persistent and most costly habits in everyday smartphone use. Costly not just in the photos that get deleted, but in the time spent deleting things that were not the problem, and in the storage warning that comes back the following week because nothing that was actually the problem was addressed.
What makes this frustrating is that the real sources of storage drain are not mysterious or deeply technical. They are consistent, predictable and addressable in a single organized session. App caches. Downloaded media in messaging apps. A Downloads folder that was never cleared. Offline content from streaming apps. Apps accumulating data quietly for months.
None of it requires deleting anything you care about. All of it is recoverable without loss. And the two settings changes that prevent it recurring, backup on and auto-download controlled, take about four minutes to configure and change the dynamic permanently.
The phone that keeps filling up is not broken. It is running exactly as its default settings were designed. Change the settings deliberately, maintain the system occasionally, and the storage problem that felt chronic becomes something you remember having rather than something you keep experiencing.
Pingback: How to Recover Deleted Photos from Android Without a Computer (2026)